

Introduction
Windows and doors decide how a home feels every day: how much light enters, how much heat and dust stay out, and how safe the family feels at night. Aluminum systems are strong, slim and almost maintenance free, but only when they are installed correctly. A frame fixed even a few millimetres out of level will drag, leak and whistle in the wind for years. In this detailed guide, Goodwell Technical Services explains all ten steps of aluminum windows installation step by step, from design and measurement to glazing, sealing and final handover.
Whether you are fitting windows in a new villa or replacing old ones in a renovation, the sequence below is the professional order followed on real sites. With aluminum, almost every visible defect at handover was decided earlier, during measurement and opening preparation, so understand each step before work begins.
Phase 1: Design and System Selection (Before Installation)
Good installation starts with the right system for each opening, not with a catalogue picture. A large sliding door needs a heavier profile series and stronger rollers than a small bathroom ventilator, and a west facing window needs better thermal and solar control than one opening onto a shaded courtyard. At Goodwell Technical Services, every aluminum windows installation project begins with matching the profile series, glass type and opening style to the size, wind exposure and use of each opening.
Decide the configuration early: sliding, casement, fixed, top hung or a combination, and confirm the colour and finish of the powder coating against the facade and interior scheme. Glass choice matters just as much: single or double glazing, tinted, reflective or low emission coatings, and toughened safety glass wherever building rules or common sense demand it, especially in doors and low panels children can run into.
- Match profile to span: Larger openings need reinforced sections, deeper tracks and heavier hardware.
- Choose glass deliberately: Double glazing for bedrooms and road facing rooms cuts noise and heat.
- Confirm opening styles: Sliding saves space, casement seals tighter, fixed glass maximises light.
- Fix colours early: Powder coat shades are approved on physical samples, never from a screen.
- Budget with a buffer: Keep ten percent aside for extra hardware, mesh screens and site surprises.

Phase 2: Site Measurement and Opening Survey (Before Installation)
Aluminum frames are fabricated to the millimetre, so measurement is the step the whole job stands on. Every opening is measured at three points across its width and three down its height, because masonry openings are rarely perfectly square, and the smallest dimension governs the frame size. Diagonal measurements expose out of square openings before they become site problems.
Site discipline matters as much as the tape. Our team records sill levels, plaster thickness, lintel condition and the position of surrounding finishes on a signed measurement sheet for every opening, then marks each opening with a code that will follow its frame through fabrication and installation. One transposed digit at this stage becomes a wrong frame three weeks later.
- Measure three points: Width and height at top, middle and bottom; fabricate to the smallest reading.
- Check the diagonals: Unequal diagonals mean a racked opening that needs correction first.
- Record sill levels: Finished floor levels decide door thresholds and sliding track heights.
- Code every opening: Each window gets a unique reference used on drawings, frames and glass.
- Sign off before fabrication: No frame is cut until the measurement sheet is verified on site.

Phase 3: Opening Preparation and Waterproofing of Reveals (Before Installation)
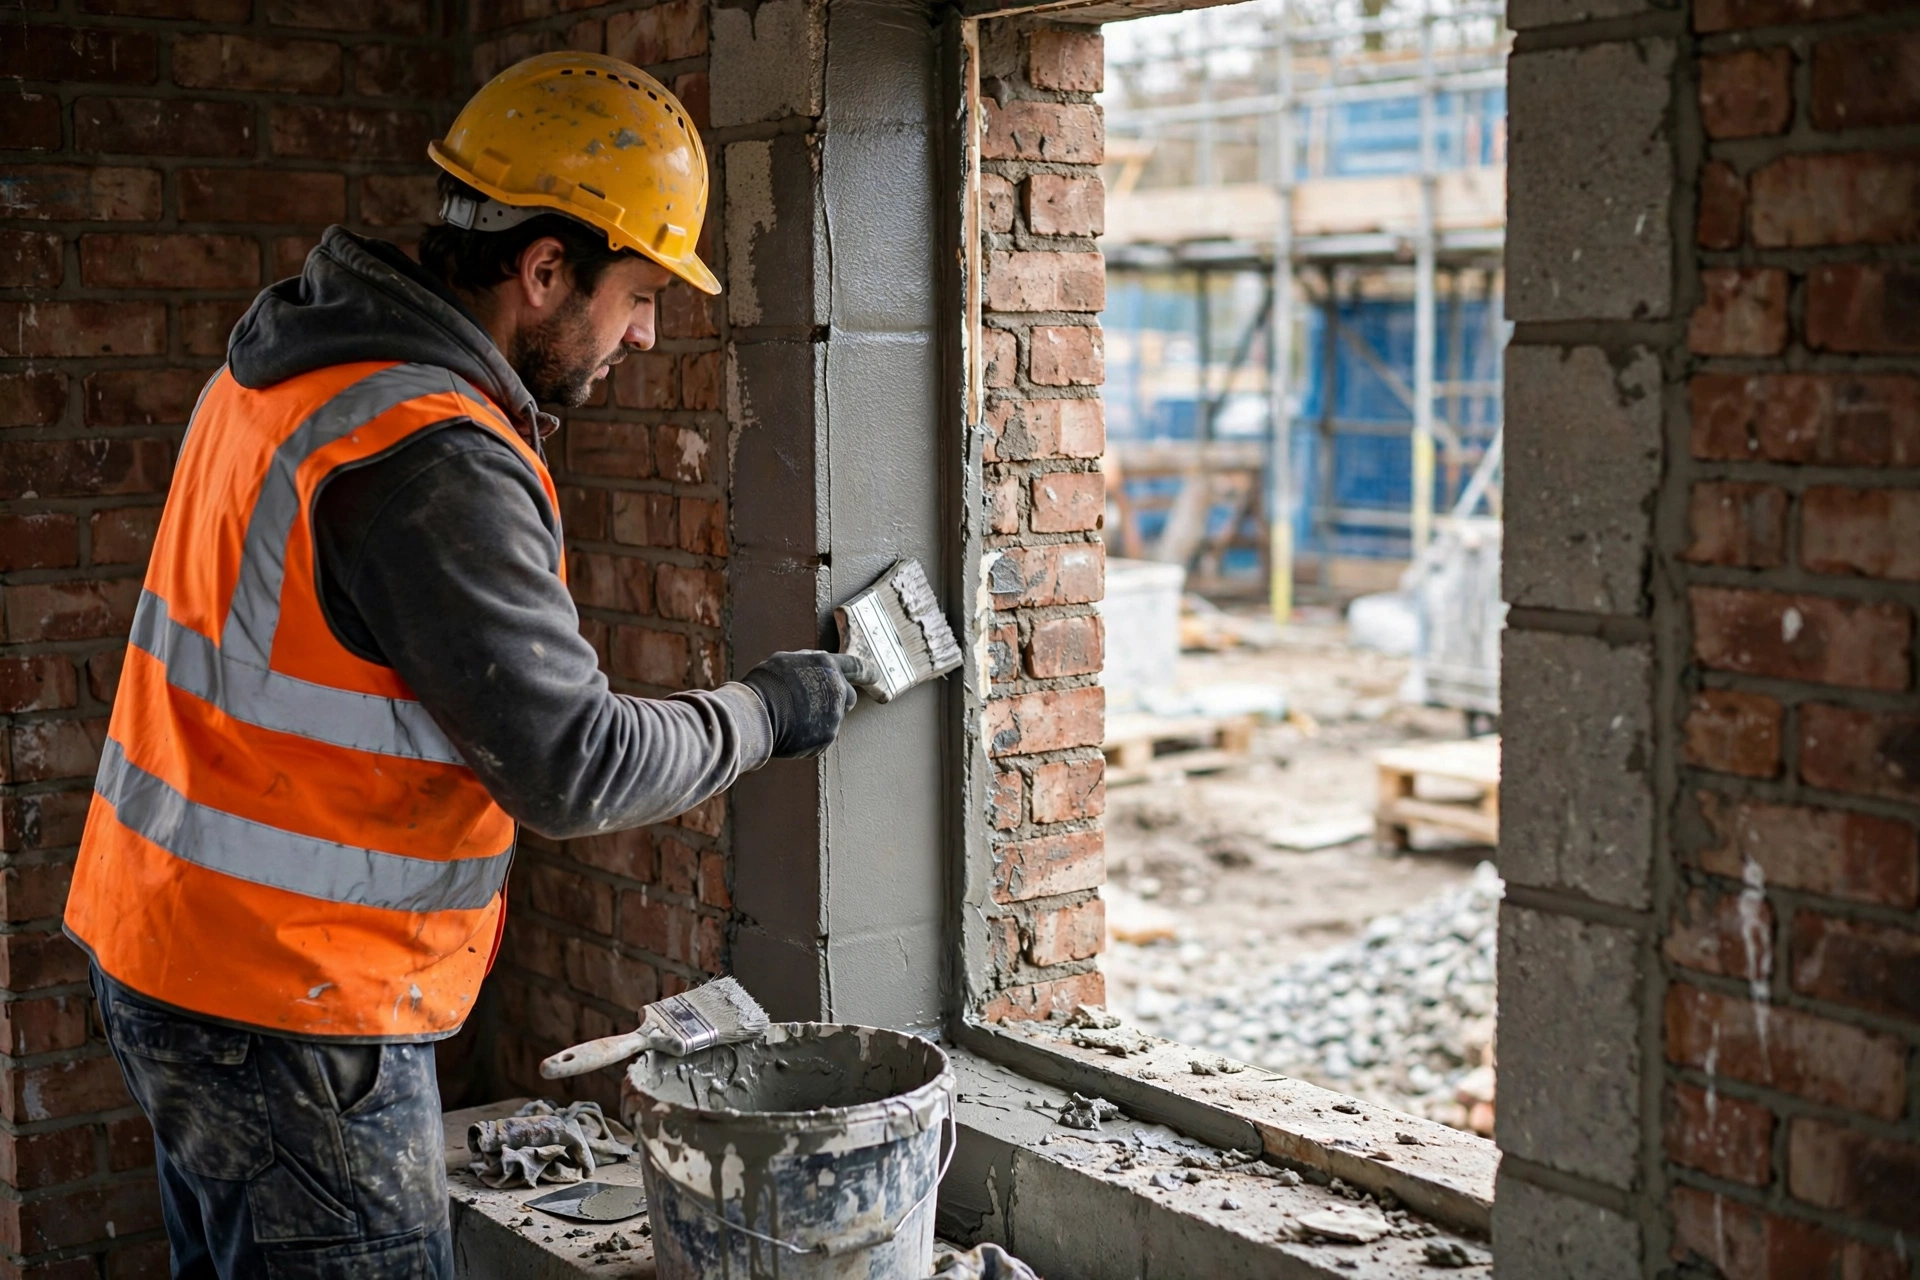
A perfect frame in a rough opening still leaks. Before any frame arrives, the masonry opening is cleaned of loose plaster and dust, cracks are repaired, and the sill is corrected to a true level with a slight outward slope so rainwater runs away from the room, never into it. High or low spots that would twist a frame are ground down or built up with mortar and cured.
The reveals, the inner faces of the opening, are then waterproofed with a cementitious coating, because the joint between frame and wall is the most common path for wind driven rain. This is why Goodwell Technical Services treats reveal preparation as part of the window itself: a sealed, sound, square opening is what allows the frame to perform as the manufacturer designed it.
- Clean to sound masonry: Loose plaster, dust and old sealant are removed completely.
- Correct the sill: Level, solid and sloped slightly outward so water sheds away from the room.
- Waterproof the reveals: Cementitious coating on all inner faces before the frame goes in.
- Repair cracks first: Structural cracks beside openings are filled and cured, never bridged by a frame.
- Protect finished floors: Cover flooring and furniture near openings before dusty preparation starts.
Phase 4: Frame Fabrication Checks (During Installation)
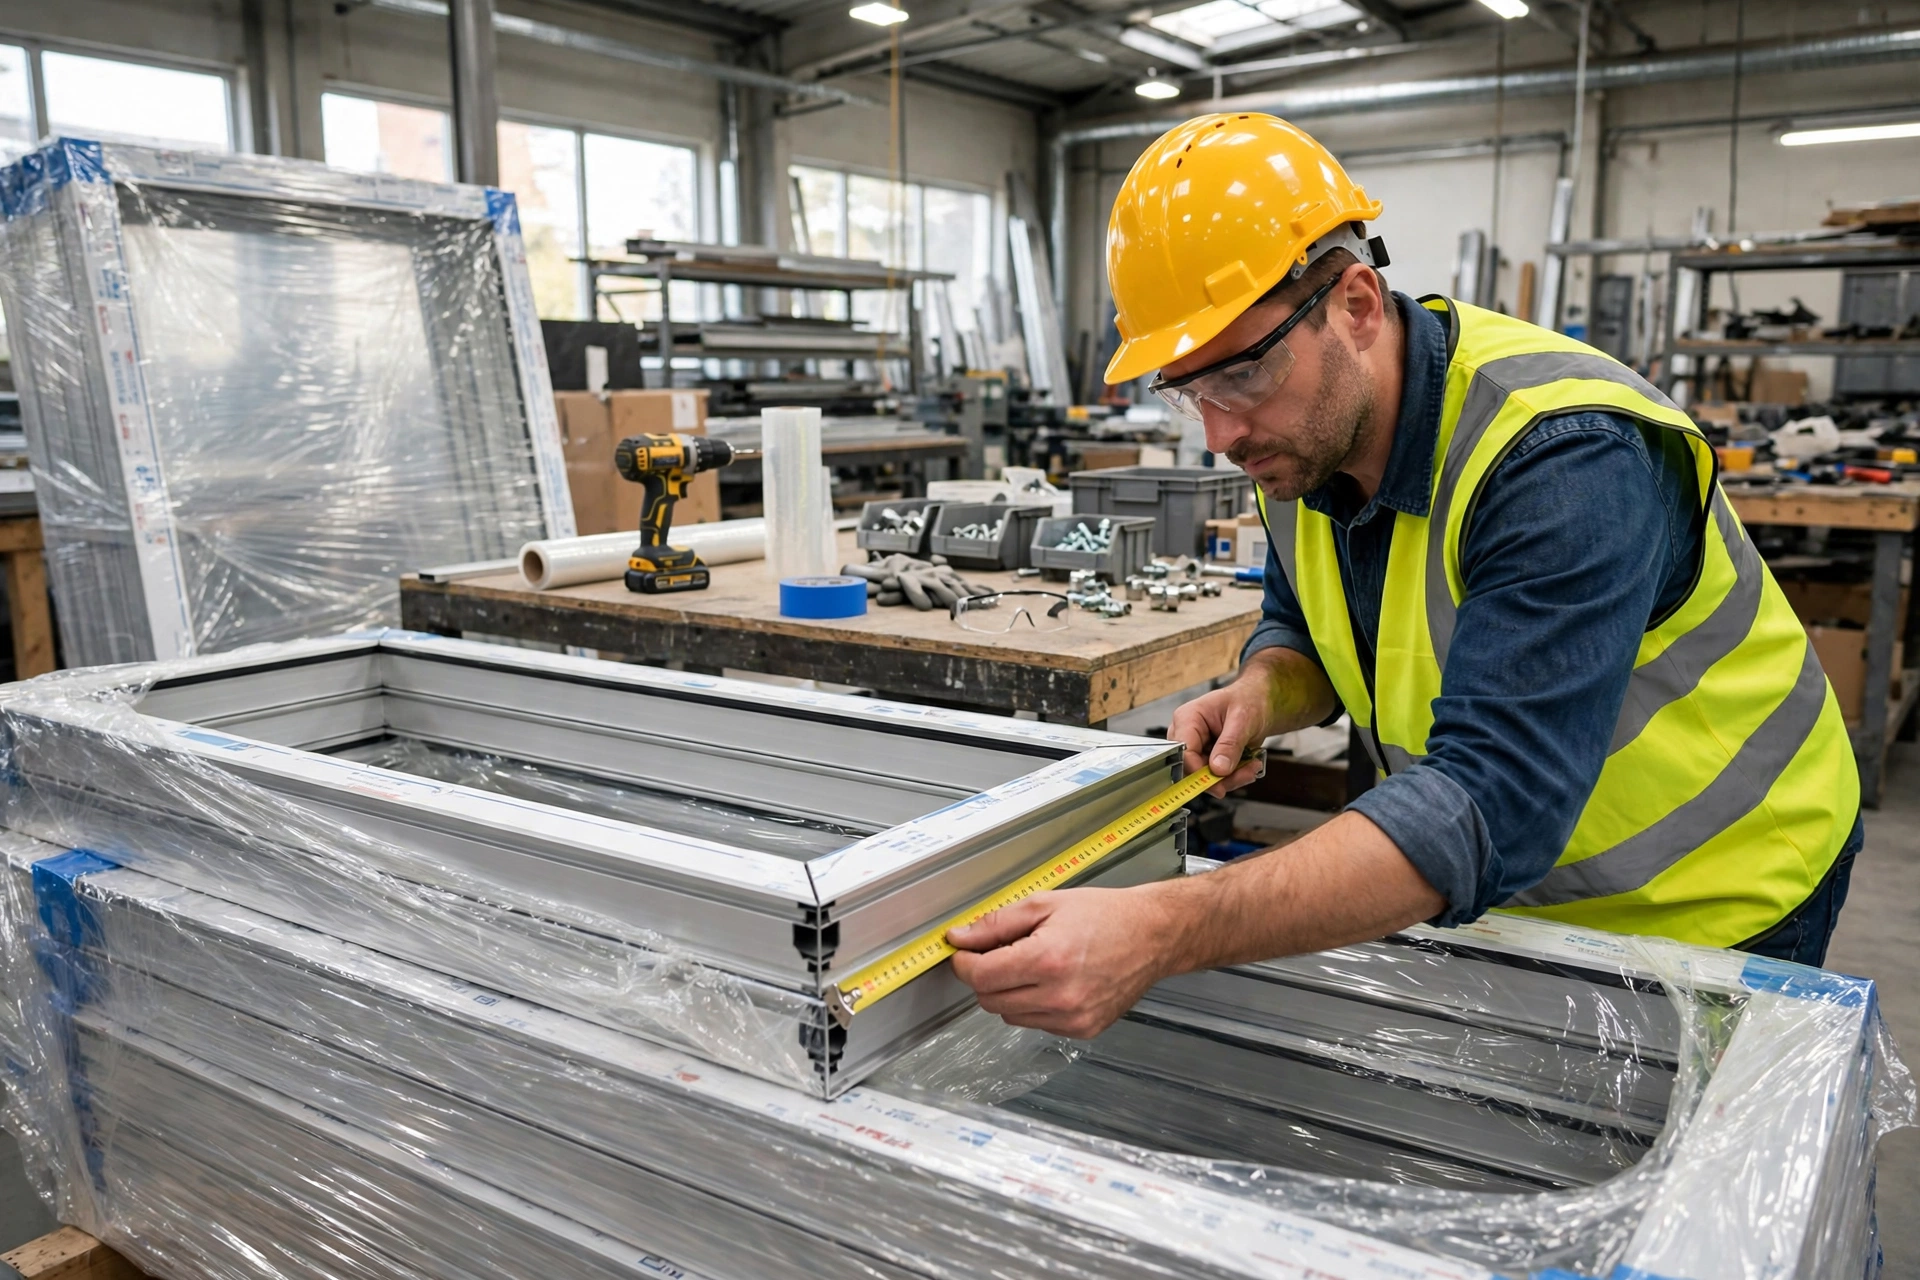
Frames arrive from the workshop cut, joined and assembled, but nothing goes into an opening unverified. Each frame is checked against the measurement sheet: overall width and height, diagonal equality, corner joint tightness and the squareness of the section. Goodwell Technical Services rejects frames with open mitre joints, scratched powder coating or twisted sections at the gate, because defects hidden inside a wall opening cannot be repaired later.
Protective film stays on the profiles during handling and fixing, and drainage slots in the bottom tracks are confirmed clear and correctly positioned. Gaskets are checked for continuity at corners, since a glazing gasket that stops short is a built-in leak waiting for the first storm.
- Verify against the sheet: Frame dimensions must match the coded measurement for that opening.
- Inspect corner joints: Mitres tight, sealed and mechanically sound, with no visible gaps.
- Check the finish: Powder coating free of scratches, dents and colour variation.
- Confirm drainage paths: Weep slots in tracks and sills open and facing outward.
- Keep protection on: Factory film remains until handover cleaning, never peeled early.
Phase 5: Frame Fixing and Levelling (During Installation)
This is the step that decides whether the window works beautifully or badly for the next thirty years. The frame is positioned in the opening on packing blocks, wedged evenly, and fixed through the frame into solid masonry with screws and wall plugs at correct spacings, closer near corners and locking points. After every few fixings, the frame is checked again with spirit level and diagonal measurements, because a frame pulled out of square by one tight screw will never seal properly.
Goodwell Technical Services never accepts a frame that is level but racked, or square but tilted: all three checks, level, plumb and diagonals, must pass together before fixing is final. The gap between frame and masonry is kept even all around, ready for backing and sealing, and door frames get extra fixings at threshold level where daily traffic loads are highest.
- Pack, do not force: Frames sit on level packers; gaps are shimmed, never closed by screw pressure.
- Fix into structure: Screws anchor into brick or concrete, never into plaster or hollow spots.
- Check three ways: Level, plumb and equal diagonals verified before and after final tightening.
- Even perimeter gap: A consistent joint around the frame for proper sealing later.
- Reinforce door frames: Extra fixings at locks and thresholds where loads concentrate.

Phase 6: Glazing and Glass Installation (During Installation)
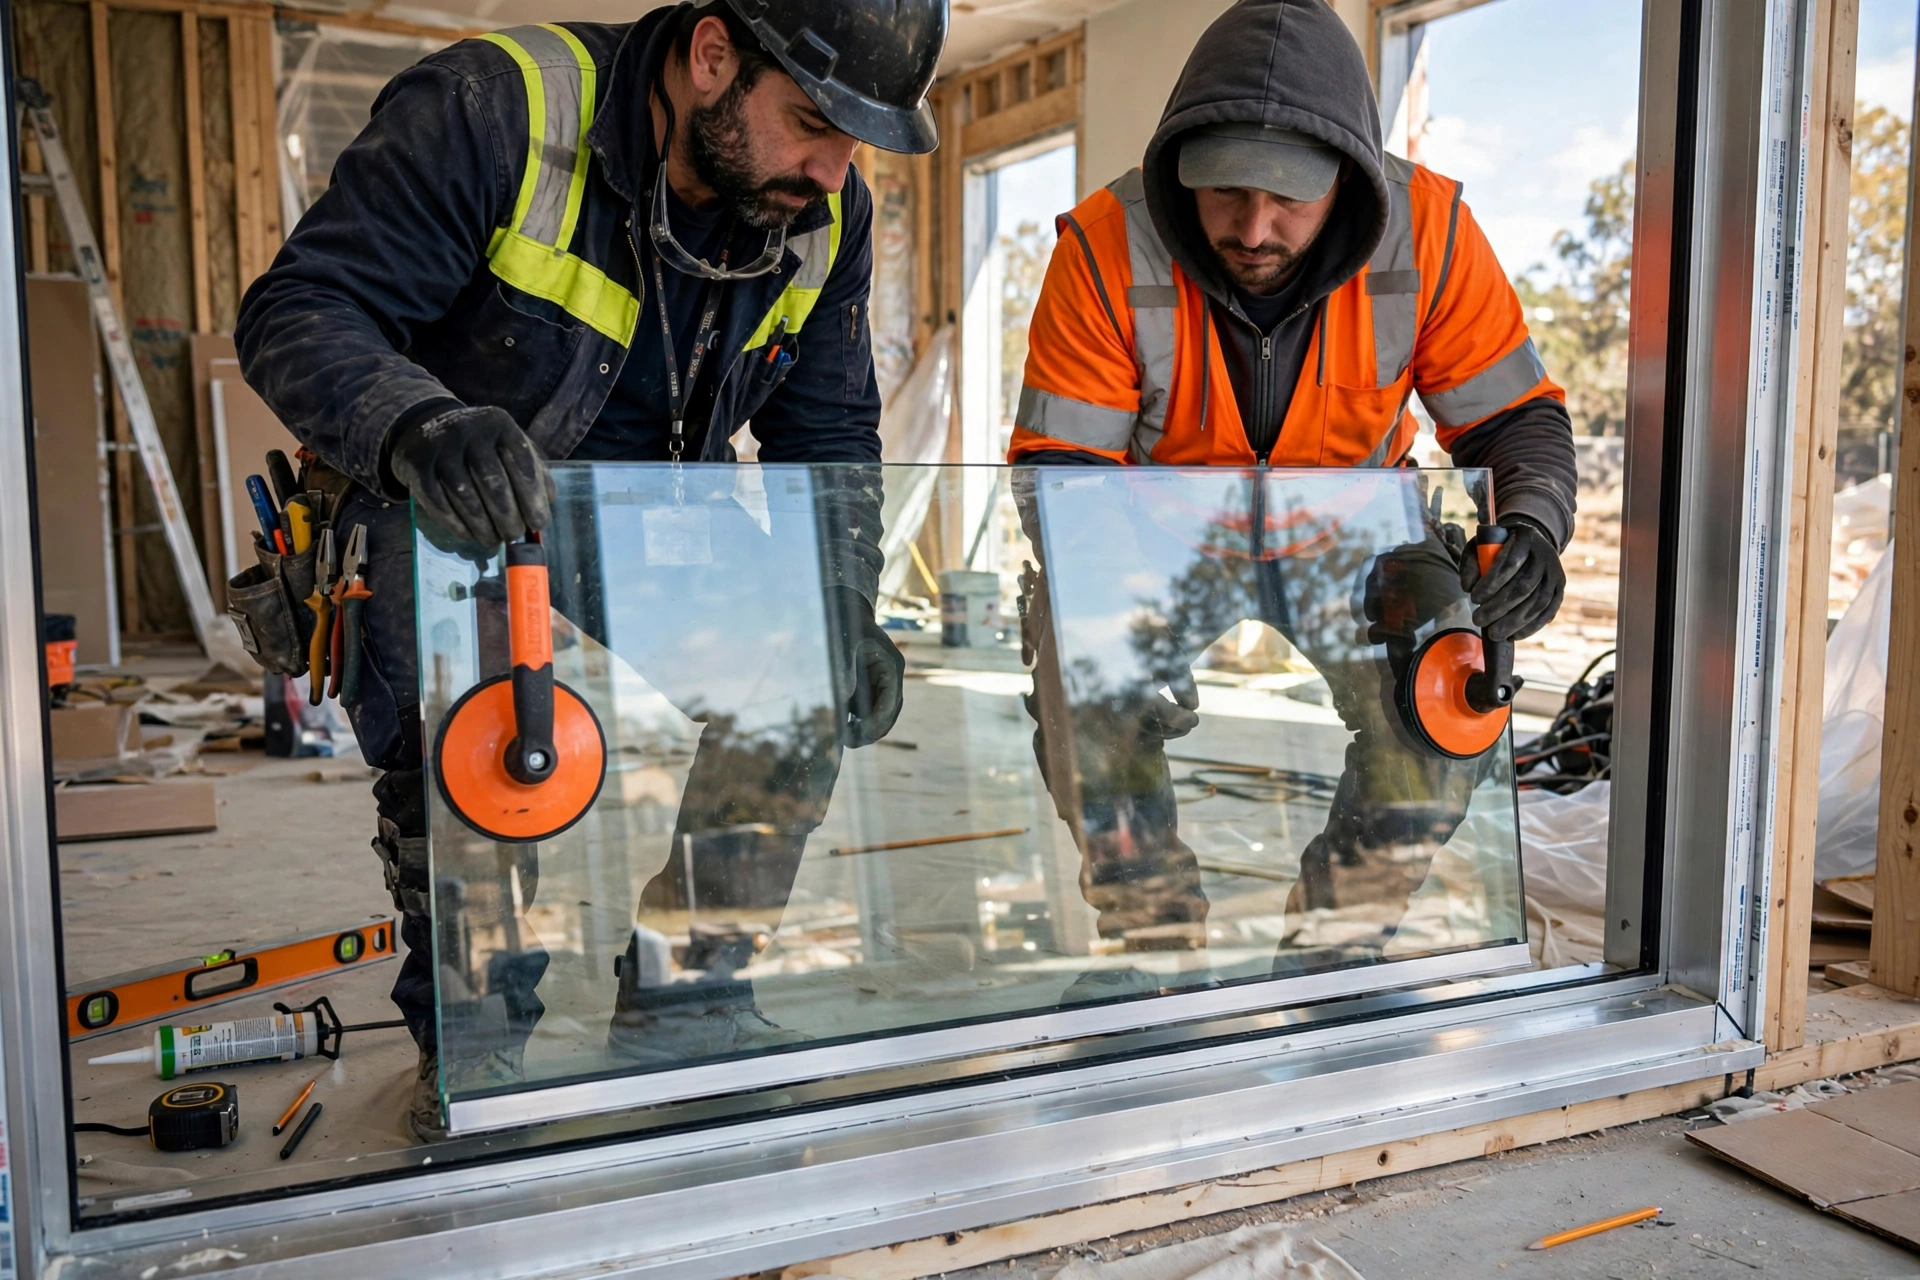
Glass is the heaviest and most fragile part of the system, and its installation is pure technique. Panes are lifted with suction cups, never by their edges, and set onto rubber setting blocks positioned near the quarter points of the frame, so the weight transfers through the frame and not through a corner of the glass. The aluminum windows installation experts at Goodwell Technical Services check every pane against its code before it goes in: thickness, tint, double glazed unit seals and toughening stamps all verified.
Glazing gaskets or structural silicone hold the glass, depending on the system, and the bead is clipped in evenly so pressure is uniform around the pane. A cracked corner or a failed double glazed seal discovered now costs a pane; discovered after handover, it costs a full replacement visit and a very unhappy homeowner.
- Setting blocks at quarter points: Glass weight must land on blocks, never on a bare corner.
- Verify every unit: Thickness, tint, coatings and safety stamps checked against the order.
- Suction lifters only: Large panes are handled with cups and gloves; edges are never gripped bare.
- Even bead pressure: Beads and gaskets seat uniformly, with no gaps at corners.
- Inspect sealed units: Any fogging or debris inside a double glazed unit means rejection.
Phase 7: Sliding and Hinged Sash Fitting (During Installation)
With frames fixed and glazed, the moving parts go in: sliding sashes onto their tracks, casement sashes onto their hinges, and door leaves onto their pivots or rollers. Rollers are adjusted so the sash travels with fingertip pressure and lands squarely into its interlock, and hinges are set so casements close onto their gaskets with even compression all around.
Alignment is judged by the reveal: the gap between sash and frame must be identical along every edge. For configuration ideas, homeowners often browse the Goodwell Technical Services homepage to compare sliding, casement and fixed combinations in completed villas. Any sash that needs force is not tight, it is wrong, and it is adjusted now while the fixings are still accessible.
- Rollers carry the weight: Sliding sashes are adjusted on their rollers, never dragged on the track.
- Even reveals: The sash-to-frame gap is constant on all four sides.
- Gasket compression: Casements close onto seals firmly but without handle strain.
- Interlocks must meet: Sliding panels engage fully at the centre for weather and security.
- Fit insect screens: Mesh panels are installed and checked for smooth travel and full closure.

Phase 8: Hardware, Locks and Accessories (During Installation)
Hardware is where security and daily comfort live. Handles, multi point locks, hinges, door closers and sliding door latches are fitted to the manufacturer’s torque and alignment, and every lock is tested with its actual key before the installer moves on. Goodwell Technical Services fits anti-lift blocks on sliding panels and shootbolts on tall casements as standard, because a beautiful window that can be lifted off its track from outside is not a finished window.
Child safety and convenience details belong to this step too: restrictors on upper floor casements, soft close settings on sliding doors, and handles positioned at heights the whole family can use. Screws are stainless or coated to match the system, since one rusting screw stains an entire frame.
- Test every key: Locks engage and release smoothly at every locking point, not just the handle.
- Anti-lift protection: Sliding panels get blocks that prevent removal from outside.
- Align keeps precisely: Locking cams meet their keeps dead centre for full compression.
- Fit restrictors upstairs: Opening limiters on casements protect children in bedrooms.
- Use correct fixings: Stainless screws throughout; no mixed metals against aluminum.

Phase 9: Silicone Sealing and Flashing (After Installation)
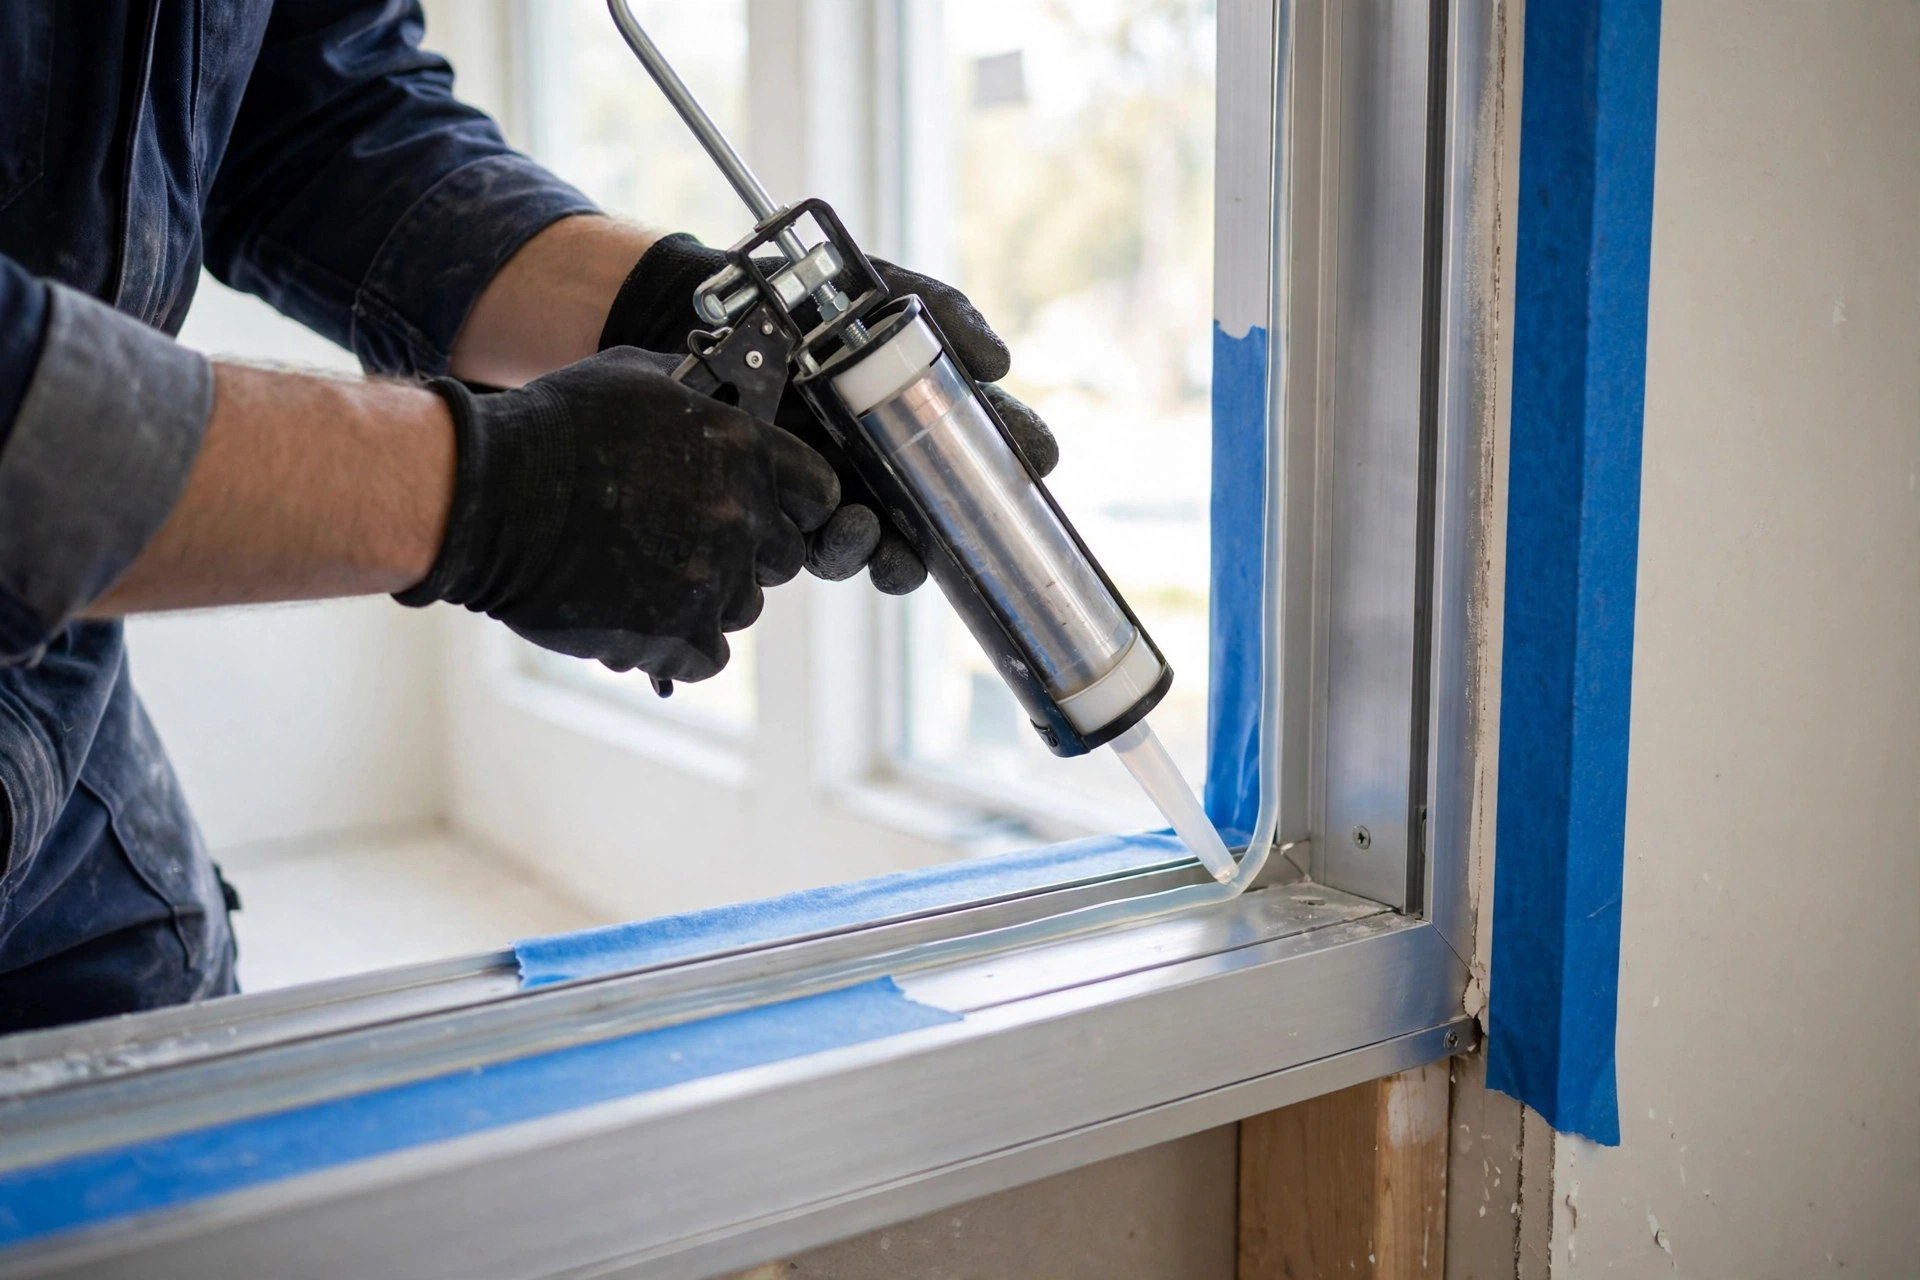
The perimeter joint between frame and wall is the final weather barrier, and it is finished as a system, not a smear. The joint is fitted with a backing rod at the correct depth, masked on both sides, and filled with neutral cure silicone tooled to a smooth, slightly concave finish that bonds to both surfaces. Goodwell Technical Services uses only exterior grade, UV stable sealant on outside joints, because cheap acetic silicone stains, shrinks and lets go within two seasons.
Where the design calls for it, metal flashing or a sloped sill dressing sheds water away from the joint entirely, and internal joints are sealed with paintable acrylic for a clean interior line. Sealant is a movement joint, not a gap filler: joints that are too deep, too thin or three sided will tear, and they are corrected in this step, not covered up.
- Backing rod first: Correct joint depth gives the sealant its designed movement capacity.
- Neutral cure silicone outside: UV stable and non staining on aluminum and masonry.
- Mask for clean lines: Tape both sides, tool once, remove tape immediately for sharp edges.
- Flash the sill: Where exposed, flashing throws water clear of the joint below.
- Respect curing time: No water testing or heavy cleaning on fresh sealant for twenty four hours.
Phase 10: Operation Testing, Cleaning and Handover (After Installation)
The snag list is the soul of a professional handover. Every sash is opened, closed, locked and unlocked; sliding panels are rolled end to end; drainage slots are flushed with water to prove they clear; and a hose test on the outside joints confirms no water reaches the inside. Goodwell Technical Services closes every snag before handover and only then removes the protective film, washes the glass and frames, and hands over keys, restrictor keys and care instructions. To book a site visit for your own windows and doors project, reach out any time.
Maintenance keeps everything working: vacuum the tracks monthly, wash frames with mild soap only, lubricate rollers and locks once a year, and never force a stiff sash, since stiffness is a symptom, not a habit. Goodwell Technical Services offers periodic window and door health checks for completed projects, adjusting hardware before small wear becomes damage.
- Operate everything: Every sash, lock, handle and screen tested through its full travel.
- Hose test the joints: Water sprayed outside must never appear inside. Any trace is resealed.
- Film off last: Protective film is removed only at final cleaning, just before handover.
- Hand over the keys: All window keys, restrictor keys and care notes go to the homeowner.
- Keep tracks clean: Grit in sliding tracks is the main cause of roller wear and stiff doors.

Common Mistakes to Avoid During Aluminum Windows and Doors Installation
Across hundreds of villas, Goodwell Technical Services has seen the same installation mistakes repeat. Avoid these and your windows and doors will stay smooth, sealed and secure:
- Measuring once, roughly: A single tape reading per opening guarantees frames that do not fit.
- Fixing into plaster: Screws in soft plaster loosen within months and the frame starts to move.
- Skipping reveal waterproofing: The frame-to-wall joint leaks in the first wind driven rain.
- Glass on no setting blocks: Weight on a glass corner leads to stress cracks and failed sealed units.
- Sealing without backing rod: Over deep silicone tears away from one side and opens the joint.
- Forcing stiff sashes: Force hides misalignment and destroys rollers, hinges and locks.
- Peeling film too late: Protective film baked on by months of sun becomes almost impossible to remove.
Conclusion
Aluminum windows and doors installation rewards precision and punishes shortcuts. Select the right system before installation, measure and prepare every opening as if the frame depends on it, because it does, fix and glaze with discipline during installation, and finish with honest sealing and full operation testing after installation. Follow these ten steps and your windows will glide, seal and shine for decades.
For windows and doors installed right the first time, contact Goodwell Technical Services for complete aluminum windows and doors installation, from design and measurement to glazing, sealing and tested handover, executed step by step exactly as described above.